Cottage Cheese Brownies with Dates
Highlighted under: Baked Bliss
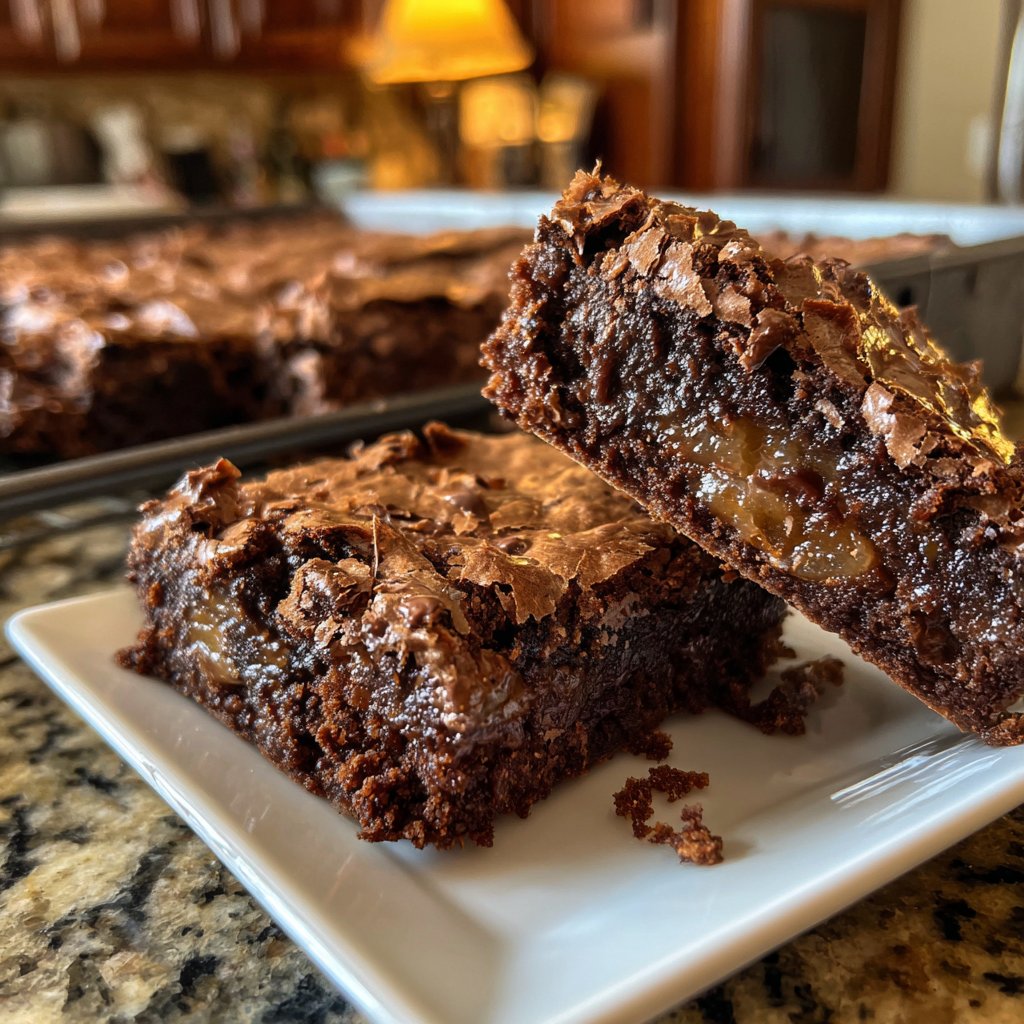
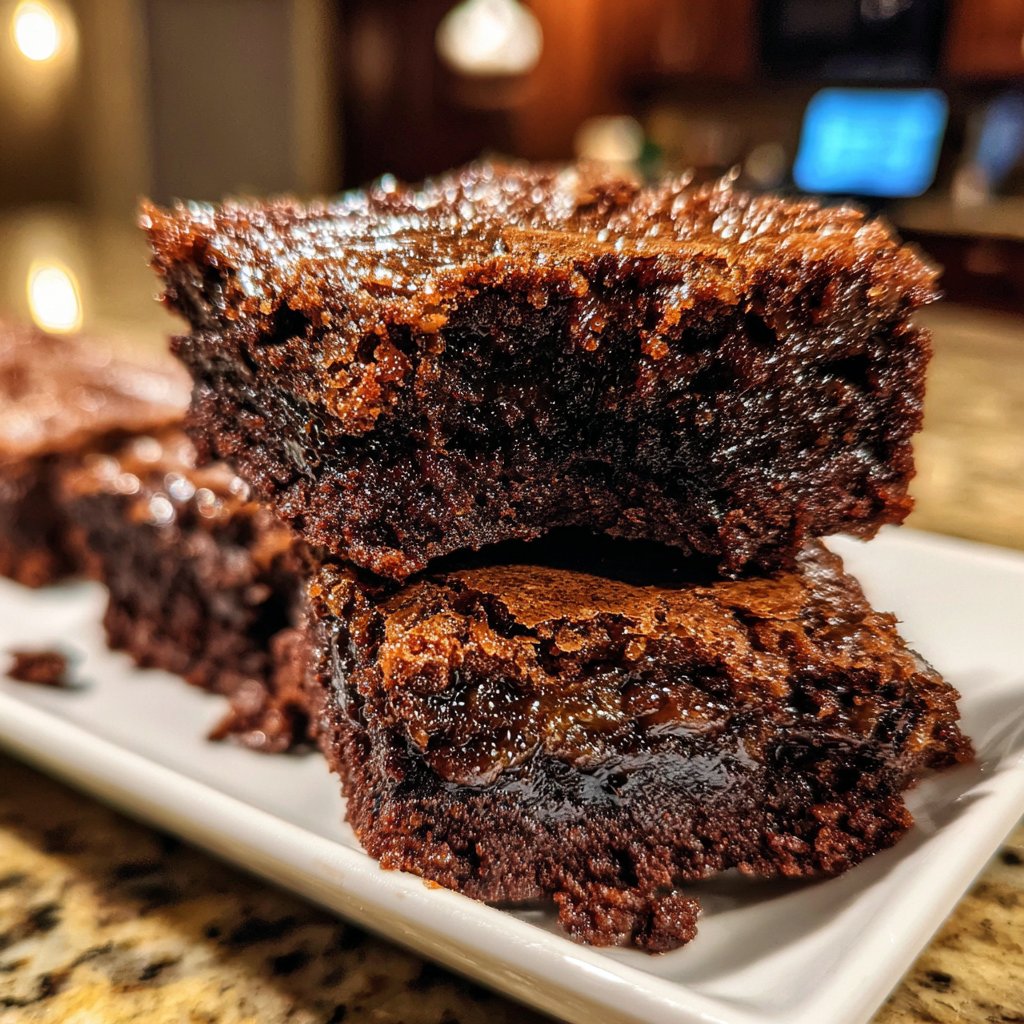
I’ve always been on the lookout for dessert recipes that balance indulgence with nutrition, and these Cottage Cheese Brownies with Dates fit the bill perfectly. The creamy cottage cheese gives these brownies a rich, moist texture while the natural sweetness from the dates ensures you can satisfy your sweet tooth without added sugars. Baking these brownies has become a family favorite, and they have impressed both my health-conscious friends and dessert lovers alike. It's a delightful guilt-free treat I love to make for gatherings.
During my quest to reinvent classic recipes, I decided to try making brownies use cottage cheese, and the results were beyond my expectations! The distinct texture of the blend creates a fudgy and satisfying brownie that makes me forget I’m indulging in something healthier.
What makes these brownies special is how versatile they are. I sometimes add nuts or a sprinkle of sea salt on top before baking for an extra layer of flavor. Baking these feels like a warm hug, and they always disappear within minutes!
Why You'll Love This Recipe
- Decadent chocolate flavor enhanced by the natural sweetness of dates
- Rich and creamy texture thanks to cottage cheese
- A healthier dessert option that doesn't compromise on taste
Understanding the Ingredients
The star ingredient in these brownies is cottage cheese, which not only provides a creamy texture but also adds a boost of protein to this dessert. When blended, it smooths out and marries beautifully with the other components, enriching the flavor without being overpowering. Opt for full-fat cottage cheese for the creamiest outcome, but low-fat versions work well too if you prefer a lighter treat. Just ensure they are blended thoroughly to avoid any curds in your brownies.
The natural sweetness of dates plays a crucial role in this recipe. They not only sweeten the brownies but also contribute moisture, keeping them chewy and soft. For optimal blending, it’s best to soak the dates in hot water for about 10 minutes before chopping. This softening step makes them easier to integrate into the batter. If you're short on dates, you can substitute them with an equal amount of prunes for a similar sweetness and moisture profile.
Baking Tips and Techniques
To ensure your brownies bake evenly, it’s essential to spread the batter into the pan uniformly. Use a spatula to smooth the top, and tap the pan gently on the counter to release any air bubbles trapped in the batter. Look for a shiny crust forming on top during baking, which indicates they’re on the right path to being fudgy, rather than cakey. If you prefer a denser brownie, slightly underbake them—remove them from the oven once a toothpick inserted in the center comes out with a few moist crumbs.
Cooling is a critical step that should not be rushed. Allow your brownies to cool in the pan for at least 15 minutes. This additional time helps them firm up, making them easier to cut without crumbling. For an enhanced flavor experience, consider enjoying them slightly warm with a dollop of Greek yogurt or a scoop of dairy-free ice cream on top. This adds a delightful contrast to the rich chocolate flavor, enhancing the overall indulgence of your treat.
Ingredients
For the brownies
- 1 cup cottage cheese
- 1 cup pitted dates, chopped
- 2 large eggs
- 1/3 cup cocoa powder
- 1/4 cup honey or maple syrup
- 1 teaspoon vanilla extract
- 1/2 teaspoon baking powder
- 1/4 cup whole wheat flour
- 1/2 teaspoon salt
Mix everything thoroughly to ensure a well-combined batter.
Instructions
Preheat and Prepare
Preheat your oven to 350°F (175°C). Grease an 8-inch square baking pan or line it with parchment paper for easy removal.
Blend Ingredients
In a blender or food processor, combine the cottage cheese, chopped dates, and eggs. Blend until smooth.
Mix Dry Ingredients
In a separate bowl, whisk together cocoa powder, baking powder, flour, and salt.
Combine Mixtures
Pour the wet mixture into the dry ingredients. Add honey and vanilla extract, then stir until just combined.
Bake
Spread the batter evenly in the prepared pan and bake for 25 minutes or until a toothpick inserted in the center comes out clean.
Cool and Serve
Let the brownies cool in the pan for at least 15 minutes before cutting them into squares. Enjoy your healthier treat!
These brownies can be stored in the refrigerator for up to a week, making them a great make-ahead dessert!
Pro Tips
- For an extra flavor boost, consider adding a handful of nuts or chocolate chips to the batter before baking.
Storing and Freezing
These brownies can be stored at room temperature in an airtight container for up to 3 days. However, if you want to prolong their freshness, consider refrigerating them, where they will last up to a week. When stored in the fridge, the flavors also deepen, making each bite even more satisfying. Just remember to bring them to room temperature before serving for the best texture.
For longer-term storage, you can freeze the brownies. Individually wrap each square in plastic wrap and then place them in a freezer-safe bag. They will keep well for about three months. When ready to enjoy, simply let them thaw in the refrigerator overnight or on the counter for a couple of hours before unwrapping to indulge in a tasty, guilt-free treat.
Serving Suggestions and Variations
For a fun twist, try adding nuts or dark chocolate chips to the batter before baking for a delightful crunch. Chopped walnuts or pecans complement the chocolate flavor beautifully, while a handful of chocolate chips can amp up the dessert’s richness. If you're looking for a more sophisticated flavor profile, consider adding a pinch of sea salt on top before baking for a sweet-and-savory finish.
These brownies also make an excellent base for customized desserts. Top them with fresh berries and a drizzle of melted dark chocolate for a gourmet touch. Alternatively, serve them warmed up with a side of your favorite nut butter for a protein-packed afternoon snack. The options are endless, so feel free to experiment and make them suit your taste!
Questions About Recipes
→ Can I substitute the cottage cheese?
Yes, you can use Greek yogurt or silken tofu for a different flavor and texture.
→ How do I store leftover brownies?
Store them in an airtight container in the fridge for up to one week.
→ Can I freeze these brownies?
Absolutely! Wrap them tightly and freeze for up to three months. Thaw at room temperature before serving.
→ Are these brownies gluten-free?
By using gluten-free flour, you can easily make these brownies gluten-free!
Cottage Cheese Brownies with Dates
Created by: Hallie Foster
Recipe Type: Baked Bliss
Skill Level: Beginner
Final Quantity: 12 brownies
What You'll Need
For the brownies
- 1 cup cottage cheese
- 1 cup pitted dates, chopped
- 2 large eggs
- 1/3 cup cocoa powder
- 1/4 cup honey or maple syrup
- 1 teaspoon vanilla extract
- 1/2 teaspoon baking powder
- 1/4 cup whole wheat flour
- 1/2 teaspoon salt
How-To Steps
Preheat your oven to 350°F (175°C). Grease an 8-inch square baking pan or line it with parchment paper for easy removal.
In a blender or food processor, combine the cottage cheese, chopped dates, and eggs. Blend until smooth.
In a separate bowl, whisk together cocoa powder, baking powder, flour, and salt.
Pour the wet mixture into the dry ingredients. Add honey and vanilla extract, then stir until just combined.
Spread the batter evenly in the prepared pan and bake for 25 minutes or until a toothpick inserted in the center comes out clean.
Let the brownies cool in the pan for at least 15 minutes before cutting them into squares. Enjoy your healthier treat!
Extra Tips
- For an extra flavor boost, consider adding a handful of nuts or chocolate chips to the batter before baking.
Nutritional Breakdown (Per Serving)
- Calories: 150 kcal
- Total Fat: 5g
- Saturated Fat: 2g
- Cholesterol: 30mg
- Sodium: 90mg
- Total Carbohydrates: 24g
- Dietary Fiber: 3g
- Sugars: 10g
- Protein: 4g